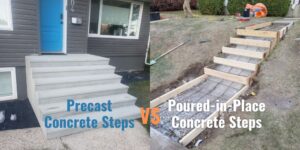
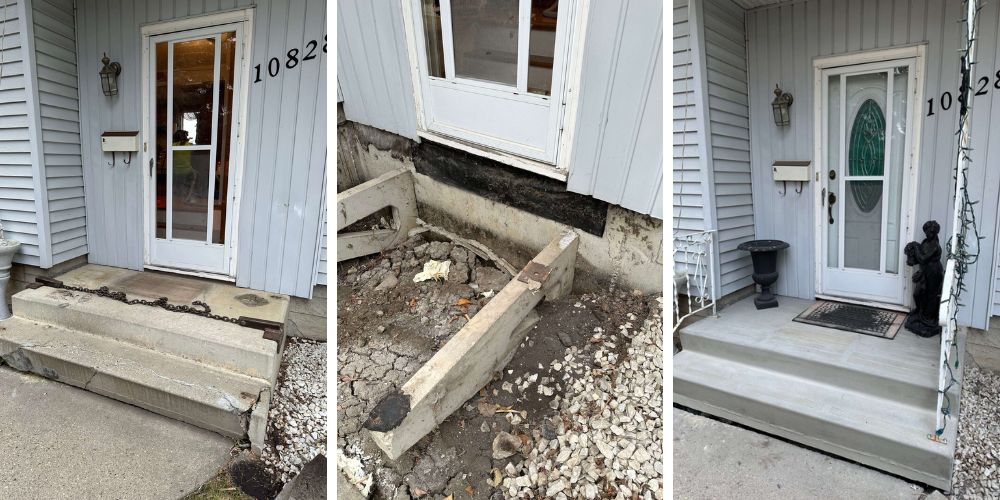
Concrete steps leading up to a home’s entrance are subject to a lot of wear and tear over time. Temperature changes, rain, snow, and regular foot traffic can all cause cracks, chips, and crumbling in concrete stairs. Repairing concrete steps is often a better solution than completely replacing them.
Most homeowners can repair minor to moderate damage to concrete front steps. With more extensive damage, you may need to hire a concrete repair contractor such as The Concrete Doctors. This includes filling cracks and chips, smoothing uneven surfaces, and sealing the repairs. But even then, targeted repairs are less costly than a full replacement.
Benefits of Concrete Step Repair
Repairing concrete steps allows you to:
- Save money compared to a full-scale replacement.
- Preserve the look and feel of the original stairs.
- Avoid demolition, mess, and disposal fees.
- Minimize disruption to your home’s entrance.
Also read: Benefits of Investing in Concrete Repairs
Assess the Scope of Repairing Concrete Steps

The first step is to thoroughly examine the concrete steps and assess the type and extent of damage. Look for any cracks, chips, crumbling sections, major settling, or other deterioration.
- Check for horizontal cracks across the step treads. These often indicate settling and can create trip hazards. Vertical cracks in the risers may point to foundation issues.
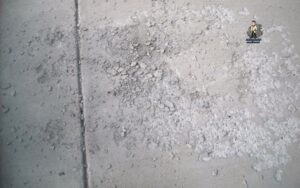
- Examine the corners and edges of steps for any chips, cracks, or spalling (flaking). This type of damage is common from repeated foot traffic and exposure to the weather.
- Determine if any areas of the steps are loose, hollow sounding, or crumbling apart. This suggests severely deteriorated concrete is in need of full replacement.
- Consider if any steps have settled substantially, causing uneven treads. This may require re-leveling the step or rebuilding that section.
- Look at the underside of the steps for signs of cracking or crumbling. Damage here can undermine structural integrity.
After thoroughly inspecting all sides of the steps, determine how extensive the damage is. Minor chips, cracks, and spalling can often be repaired. However, major structural deterioration may require the full replacement of steps.
Materials Needed
In repairing concrete steps, you’ll need some basic materials:
- Concrete mix: Use a high-quality concrete mix designed for repairing steps and vertical surfaces. A polymer-modified mix offers extra strength and adhesion.
- Bonding agent: Also called concrete adhesive, this helps the new concrete bond securely to the old. Look for a bonding agent formulated for vertical repairs.
- Tools: A trowel for smoothing repairs, a grout bag for filling cracks, a wire brush for cleaning damaged areas, safety gear like gloves and goggles, and more. Gather any specialized tools needed for your project.
- A bucket, water, and a mixing tool for the concrete: You may also need a chisel and hammer for demolishing damaged sections.

Make sure you have all the required materials on hand before starting repairs. With the help of our Exterior Concrete Checklist you can shortlist the repairs needed before you make any budgeting decisions. Also, check our Concrete Repair Quick Budget before you make any purchases. Purchase the amount needed for your project to avoid waste and prepare the right concrete consistency.
Prep Work
Before applying new concrete, you’ll need to thoroughly clean and prepare the damaged areas. This step is crucial for achieving a long-lasting repair.
First, use a wire brush and broom to scrub away any dirt, debris, or loose chunks of concrete from the damaged sections. This allows the new concrete to properly bond. Be sure to sweep and vacuum up any remaining particles.
Next, you’ll need to chip away any sections of weakened or cracked concrete with a hammer and chisel. Remove loose pieces until you expose solid, intact concrete underneath. Go deep enough to create a cavity for the fresh concrete patch to properly adhere.
Finally, apply a concrete bonding agent to the damaged areas per the product instructions. Etching the surface will help the new concrete achieve maximum grip and strength. Allow the bonding agent to dry completely before adding new concrete.

Mix Concrete
Properly mixing concrete is crucial for durable repairs. Follow the package directions for the concrete product you have selected. Typically, you will:
- Add water gradually to the dry concrete mix. Add a little water at a time, mixing thoroughly between additions.
- Mix just long enough to achieve a workable, moldable consistency. Over-mixing can affect curing and strength.
- The concrete should hold its shape when molded without separating or being too runny. Test the consistency by shaping a ball in your hand.
- Avoid adding too much water, which weakens concrete. The mixture should be moist without being soupy.
- Mix concrete in a wheelbarrow or mixing tub using a shovel, hoe, or electric mixer.
- Mix thoroughly until blended to a uniform color and consistency.
The key is adding the right amount of water for the concrete product and the job at hand. Follow the package instructions for the proper water ratio. With practice, you’ll get a feel for achieving the ideal concrete consistency.
Fill Damaged Areas
Use a trowel to fill in any cracks or chips in the concrete. Apply a layer of concrete mix over the damaged areas, using the trowel to pack it in tightly. Make sure to overfill the cracks and chips slightly, as the concrete will settle a bit as it cures.
For deeper holes or divots, it’s best to use a grout bag to fill in the damaged section with concrete. Slowly squeeze the bag while moving it in a circular motion to fill the hole without trapping any air pockets. Overfill the hole slightly since the concrete will settle. Use a trowel to smooth off the excess.
Be sure to fill any damaged areas, slightly mounding the concrete over the defects. This will allow for proper curing and shrinkage as the concrete dries. It’s better to apply too much than too little when filling cracks and holes. Once cured, you can smooth off any excess hardened concrete if needed.
Smooth and Shape Repairs
Once the concrete has begun to harden, it’s time to smooth out the repaired areas and shape them to match the existing contours of the steps. This is an important step to achieving a seamless, uniform appearance.
Use a steel trowel to smooth over any overfilled or uneven areas in your repair. Apply firm pressure in a circular motion to flatten and smooth the concrete. Work over the entire repair area until it is flush with the surrounding concrete.
Pay close attention to the existing shape and contours of the steps as you trowel. Use the trowel to sculpt and shape the repair areas so they blend into the pattern of the original steps. For example, create any decorative edges or grooves to match the rest of the steps. Feather the edges of the repair so they taper naturally into the existing concrete.
Seal Repaired Areas
After the concrete repair has fully cured, it’s important to apply a concrete sealer to the repaired sections. This helps protect the concrete and prevent future cracking, crumbling, and deterioration.
When applying sealer:
- Make sure the concrete surface is fully cured, clean, and dry. It takes about 28 days for new concrete to fully cure.
- Use a high-quality concrete sealer designed for exterior horizontal surfaces like steps. Acrylic and polyurethane sealers tend to work best.
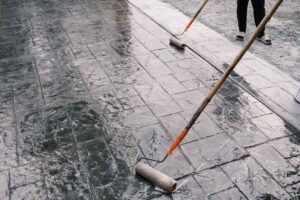
- Apply the sealer according to the manufacturer’s instructions, using a paint roller, paintbrush, or pump sprayer. Apply it evenly across the surface.
- Apply two coats of sealer for best protection, waiting for the recommended drying time between coats.
- Extend the sealer 6-12 inches beyond the repaired areas, sealing the surrounding original concrete as well. This helps blend the appearance.
- Avoid foot traffic until the sealer has fully cured. Check the sealer instructions for exact cure times.
Also read: The Best Concrete Sealing Company in Edmonton
Sealing your repaired concrete steps helps lock in the repairs and prevent future damage from weather, freezing, salts, and regular foot traffic. It’s an important final step to extend the life of your repaired concrete. Reapply sealer every 1-3 years for ongoing protection.
Maintenance Tips
Properly maintaining your repaired concrete steps will help prevent new damage and deterioration. Here are some tips:
- Annual inspection for new cracks: At least once a year, thoroughly inspect your concrete steps for any new hairline cracks or damage. Seal minor cracks right away before they expand. Larger cracks likely indicate a need for more extensive repairs.
- Reseal every 2-3 years: Reapply concrete sealer to your steps every 2-3 years. This protects the concrete and keeps moisture out of the cracks. Use a high-quality acrylic sealer for the best results. Properly prep the surface before re-sealing.
- Safely de-ice in winter: Use calcium chloride or rock salt rather than magnesium chloride deicers, which can damage concrete. Only apply deicers when needed. Shovel early before ice forms to avoid needing a deicer. Never use hot water to melt ice on steps, as this can crack the concrete.
Bottom Line
The process of repairing concrete steps is an elaborate task that requires careful assessment, preparation, and execution. By following the step-by-step repair process outlined by The Concrete Doctors, homeowners can effectively address minor to moderate damage and extend the lifespan of their concrete steps.
Not only does repairing concrete steps offer cost savings compared to full replacements, but it also preserves the original aesthetics and minimizes disruption to the home’s entrance. Through proper maintenance and proactive care, homeowners can ensure the longevity and durability of their repaired concrete steps, enhancing both safety and curb appeal for years to come.